Workspace Settings
Customizing your brand settings in Doraverse and control how much access the entire workspace or each users have when using models.
Branding Settings
Brand Name
Choose a concise, clear name that represents your team or company.
This name appears in browser tabs, SEO metadata, and throughout the application interface, so keep it simple and easy to recognize (up to 50 characters).
Tagline
Use this space for a brief, memorable phrase that complements your brand name.
It appears alongside the brand name in browser tabs and SEO metadata, helping convey what your workspace or company is about at a glance.
Description
This is the place to write a succinct overview of your brand. It’s used in SEO metadata and social media sharing cards, so try to clearly communicate your team’s mission, purpose, or core service in just a few sentences. Aim for clarity and relevance to make your workspace more discoverable and engaging.
Logo (Light Mode & Dark Mode)
Upload your logo image optimized for light and dark theme backgrounds. This logo will appear on the main screen, browser tab icon, and app icon.
The recommended size is 256 x 256 pixels to ensure it looks sharp and professional.
Poster
The image will be displayed when your workspace links are shared on social media platforms.
To create the best impression, use a high-quality image sized around 2400 x 1256 pixels.
Department Settings
Allow you to organize your workspace into departments, making it easy to manage teams, assign resources, and monitor usage.
Add a New Department
Click the Add Department button in the upper right corner.
Enter the new department name in the dialog box that appears.
Click Save to add the department, or Cancel to exit without saving.
Your new department will appear in the list immediately.
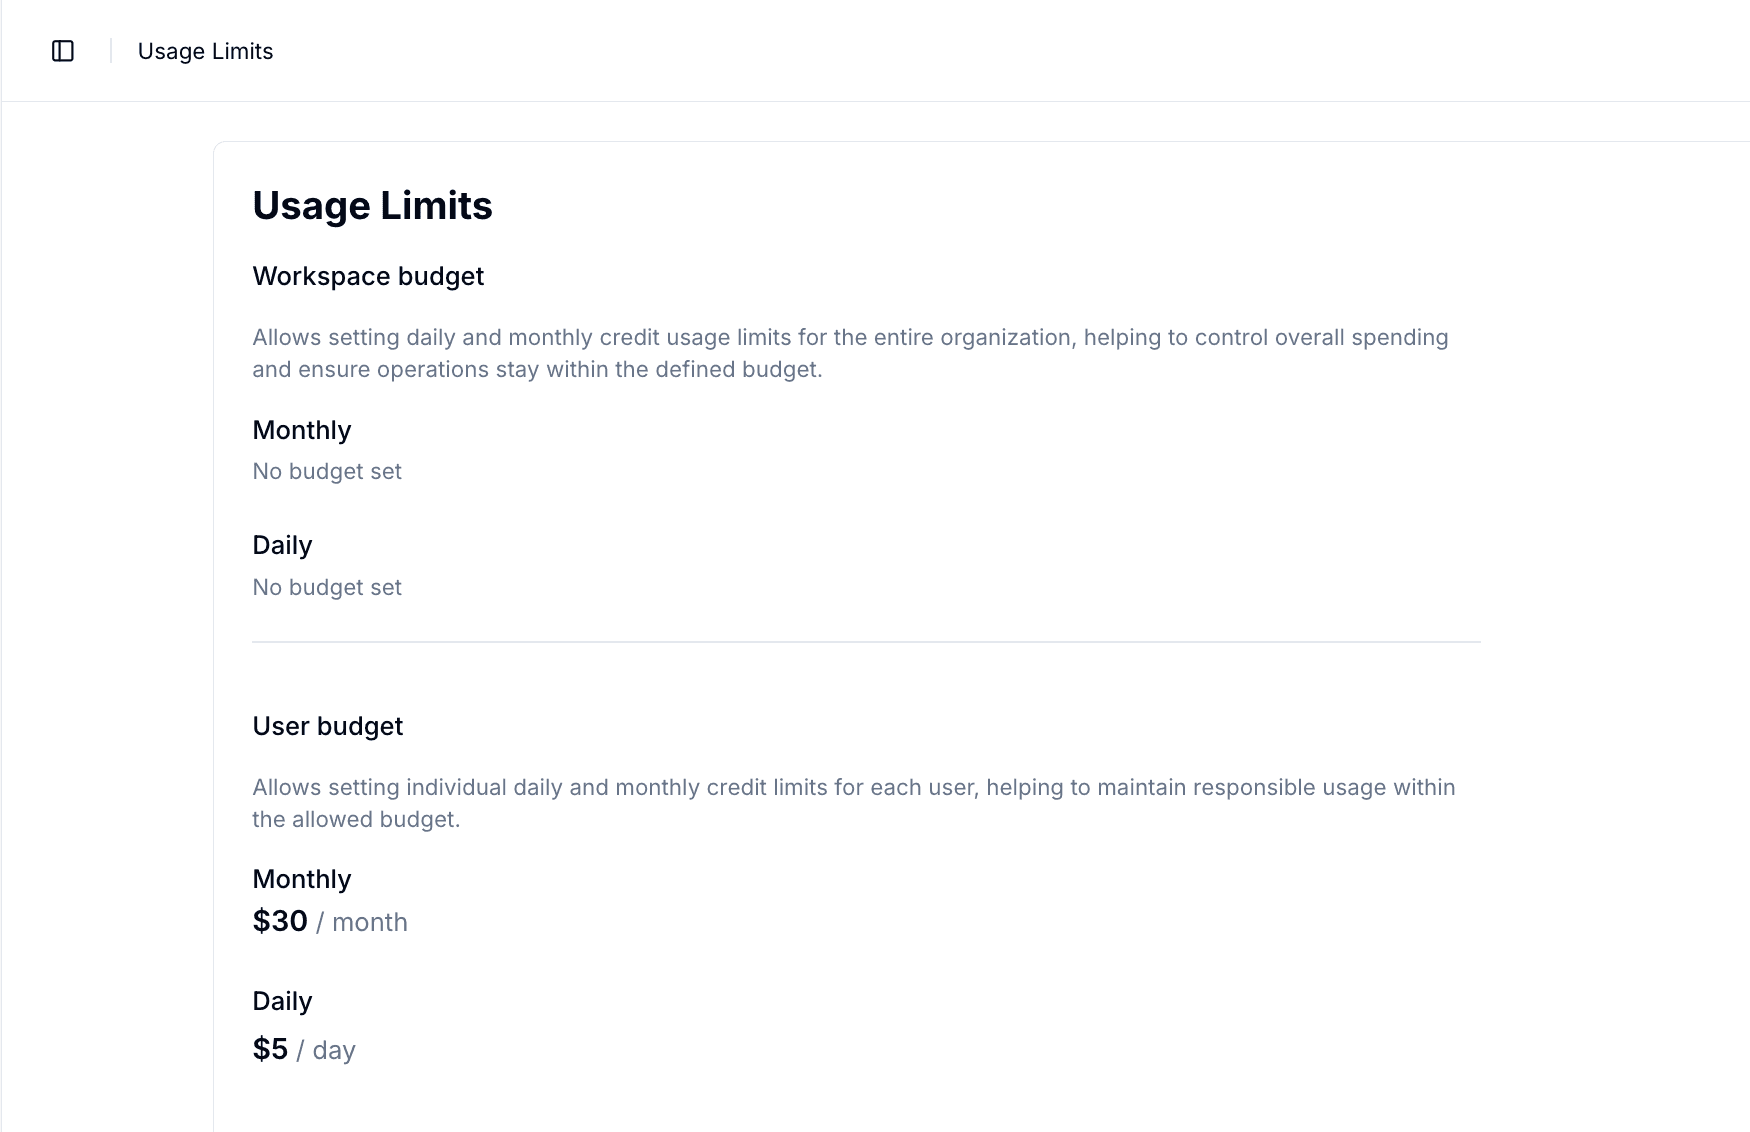
Set Up AI Limits
From the main screen, go to Account → Admin Settings → Usage Limits
Click Edit button in the top right to enable changing the limits.
Set Credit Limits
Set Workspace Credit Limits: This helps manage overall AI expenditure and keeps organization-wide usage within budget. Enter the desired daily and monthly credit limits for your entire workspace.
Set Member Credit Limits: This ensures individual users do not exceed allowed credit, providing granular control over usage. Enter the daily and monthly credit limits for each member.
Click Save to apply
Join our Community
Any other questions? Get in touch
