Member Management
Manage your workspace roster: add member, assign roles remove members.
The Member Management tab is where you control and organize workspace members in Doraverse. Navigate to: Account → Admin Settings → Members
Here, you can:
View all current members, their assigned roles, and paid seats.
Search the full member list by email, role, or last active time.
Add new members, change roles, or remove members.

Add Members
Follow these step to bring new people into your workspace:
Click Add Members.
📌 Note: You can only add members based on the number of available seats in your workspace.
Enter details:
Email: Add one email per line.
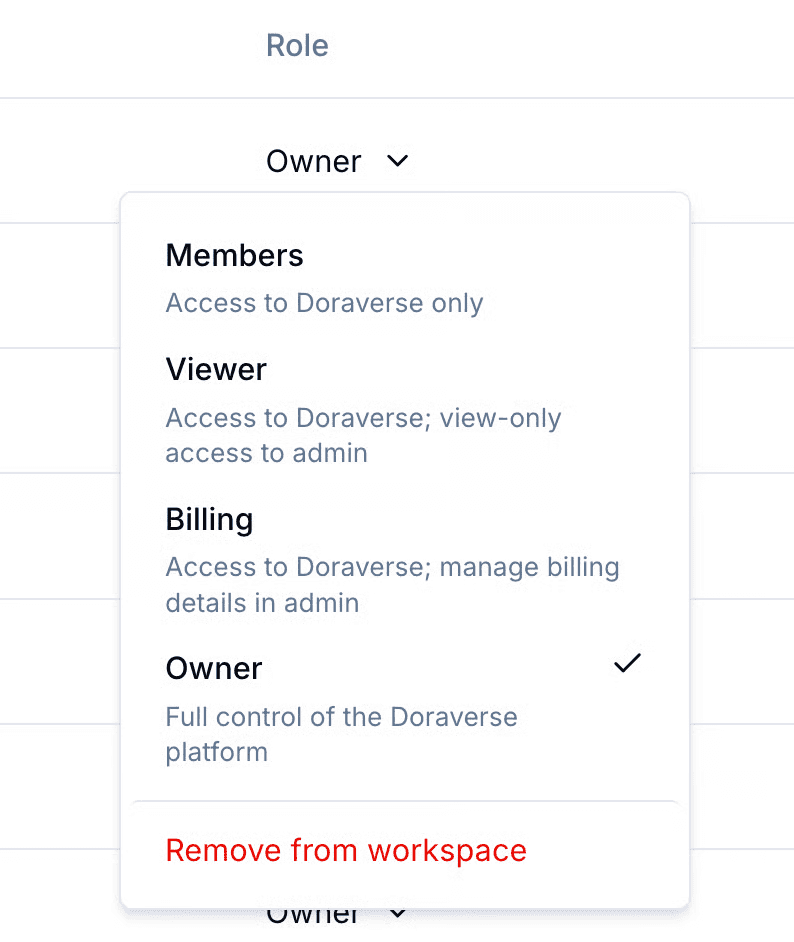
Role: Select one of the following:
Owner – Full control of the workspace.
Member – Access to Doraverse features only (no access to Admin Settings).
Billing – Manage billing details only.
Viewer – View-only access.
Department: Assign the department the member belongs to.
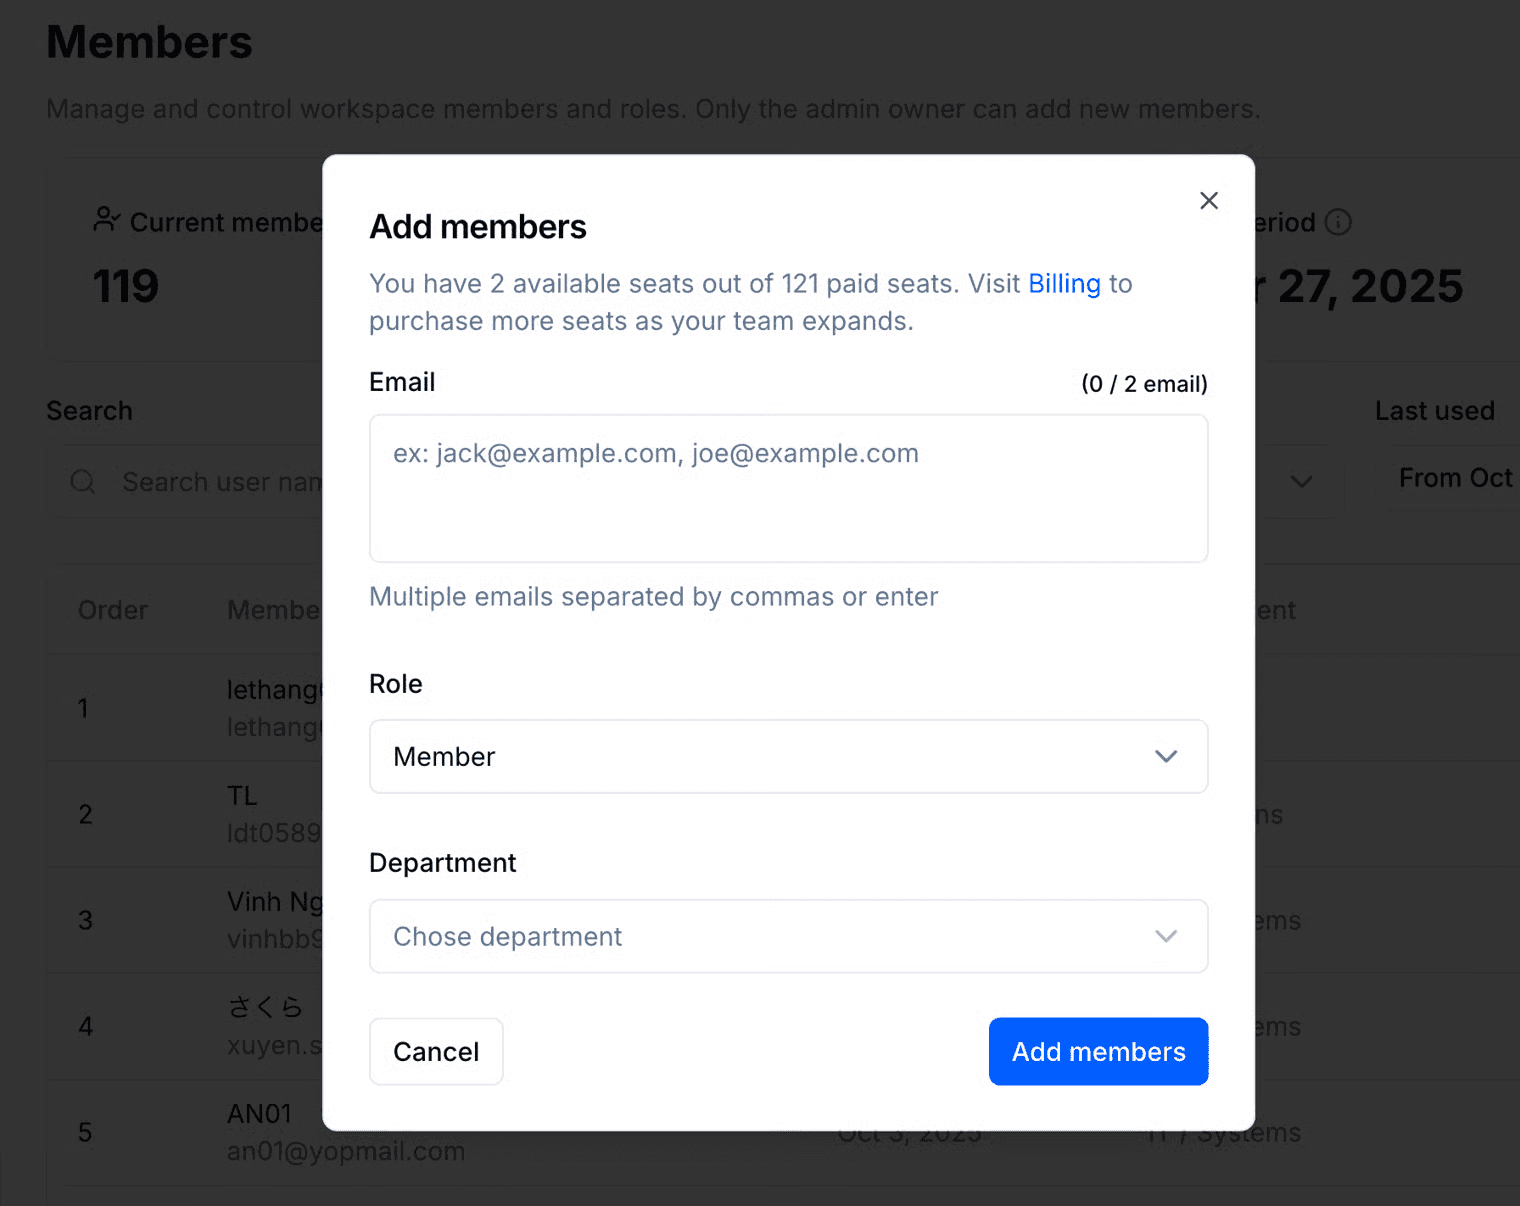
Click Add member
Doraverse will email them an invitation email with the log in credentials. If they haven’t joined yet, just click Resend to send another invite.
Change Roles
To update a member’s permissions:
Find their name in the member list.
Click the Role dropdown and select the new role.
📌 Please note: Only Workspace Owners can change roles.
Removing Members
Workspace Owners can remove members at any time:
Find the member in the list.
Open the Role dropdown next to their name.
Select Remove from workspace.
Workspace Owners Leaving
An Owner cannot leave the workspace if they are the only remaining Owner while other members are still active.
If you want to leave but there are still members, you must either assign another Owner, or remove all members first.
Once the last user leaves, the workspace becomes Inactive. You’ll have a 30-day grace period to reactivate by adding members back. After 30 days, the workspace (and its subdomain) will be permanently deleted. Lear more in our Term of Service.
Join our Community
Any other questions? Get in touch
